|
|
|
| How to tell which thermostat you have | |

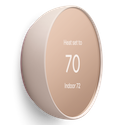
Nest Thermostat E and Nest Learning Thermostat
If your Google Nest thermostat won’t turn on and there's a blinking red or green light, or no light at all, there could be a power issue or your thermostat may have frozen during a software update. Follow the troubleshooting steps below that match the issue you're seeing.
Before you begin
- Your thermostat should automatically turn on once it’s connected to your system and your system is powered up.
- During regular use the screen may turn off if it doesn’t sense motion. It'll turn back on when it senses someone is nearby or when someone uses the app to control it.
- Your Nest thermostat uses the voltage from your system’s wires to keep its internal battery charged. If the power to your system is switched off or there’s a blackout, the battery has enough capacity to keep working for a while. Your thermostat will also turn off features like Wi-Fi to preserve battery life before it must turn off completely.
- If there's a Wiring Report or other help message on your thermostat or in the app, follow the troubleshooting steps in Troubleshoot Nest thermostat help codes.
Use the troubleshooting steps below only if your thermostat is unresponsive when you turn the ring or press the screen.
1. Blinking red light on your thermostat
Troubleshoot after installation
If you’ve successfully installed your Nest thermostat, but a blinking red light appears after you’ve been using it regularly for some time, there may be a problem with the thermostat wiring or another power issue. For instance, the blinking red light may show up then go away on its own repeatedly.
Skip to section 3 below and follow the instructions for checking that the wires are in the right thermostat connectors and are properly seated, and to check that there aren’t issues with your system.
Troubleshoot during installation
- Speed up charging with a USB cable.
- Pull off the thermostat display and use the USB port on the back to charge it with a USB cable and wall charger. Depending on the model you have, it'll be either mini or micro USB.
Note: Do not use a computer USB port or other unpowered USB port for charging.- The display should eventually light up with a message asking you to connect it to the base.
- Reconnect the display to the thermostat base. Press firmly until you hear it click into place.
- The blinking red light doesn’t go away or keeps coming back. There are a couple of causes for a persistent blinking red light. You’ll need to check the power readings on your thermostat.
- Charge your thermostat with a USB cable if needed.
- Reconnect the display to the thermostat base and go to Settings

Technical Info
- If the Voc, Vin or lin values are not within the specific ranges listed here, there may be a wiring or system issue:
- You may need to connect a C wire or Nest Power Connector to your thermostat. If there’s a C wire connected to your system’s control board, you can put it in the thermostat’s C connector to check if that helps. Here are instructions on how to check.
- There’s a problem with your system and it may need maintenance for a variety of reasons. For example, a clogged air filter can cause your system to overheat and automatically shut off. When this happens, your Nest thermostat can't draw power from your system to charge its battery. You may also find a Furnace Heads-Up message on the thermostat screen, in your app messages, or in your monthly Home Report email. Contact a local professional to service your system and check your thermostat wiring.
2. Blinking green light on your thermostat
A blinking green light near the top of your Nest thermostat’s display means that it’s updating the software, starting up, or restarting. Typically, this will only last a minute or two. Once your thermostat has finished starting up, it'll turn on so you can use it.
If the light blinks green and your thermostat is unresponsive for more than 15 minutes, it may have frozen during the update.
- Try to remove and reconnect the display. Pull it straight off the base. Make sure the pin connector is lined up correctly and push it back onto the base. You should hear a click to confirm it is properly seated.
- If reconnecting the display doesn't help, you can manually restart it.
3. No light on your thermostat
1. Check that the display is properly connected to the base
If the display isn’t fully seated on the base, your thermostat won’t turn on and can’t charge its battery.
- Pull the thermostat display straight off the base.
- Make sure that there aren’t any cables sticking out from the wall that might prevent the display from being fully seated. If there are, press them back into the wall.
- Line up the display and base connectors and press the display straight onto the base until you hear it click into place.
- If your thermostat shows you a blinking red light, the battery is charging and it'll eventually turn on. It can take up to an hour if the battery is extremely low.
2. Check that your system is receiving power
- Try to turn off the breaker or switch that controls power to your system, then turn it back on again. Make sure the switch is pushed all the way to the On position.
- If you have a fuse box, check that the fuse controlling power to your system isn’t blown and is working normally. Replace it if needed.
- If your thermostat shows you a blinking red light, the battery is charging and it'll eventually turn on. It can take up to an hour if the battery is extremely low.
3. Double check your system compatibility
Connecting a Nest thermostat to an incompatible system, such as a millivolt, proprietary or high voltage system, won’t deliver the power needed to charge your thermostat’s battery and can damage your Nest thermostat.
4. Check your thermostat’s wiring
Symptoms caused by wiring issues usually occur when you're first installing your thermostat.
Important: Turn off power to your system at the system switch or fuse box. This helps protect your system and thermostat from possible damage.
Check that each wire is fully inserted into the base and isn't corroded.
- Pull the thermostat display off the base.
- Pull out one wire and inspect it.
- The exposed part of the wire should be clean, straight, and 3/8” (1 cm) long. Cut and re-strip any crooked or corroded wire ends.
- Reinsert the wire. The connector button should stay down. If it’s not, the wire isn’t fully inserted. Repeat the above steps with each wire.
- Once you've checked all the wires, push the display onto the base until you hear a click.
- Turn the system power back on.
- If your thermostat shows you a blinking red light, the battery is charging and it'll eventually turn on. It can take up to an hour if the battery is extremely low.
- If there's no blinking red light, it's possible that you’ve put wires into the wrong thermostat connectors. Make sure you've entered your system’s wires correctly into the app and follow the wiring diagram it gives you.
5. Charge with a USB cable
You should fix any issues with your system or thermostat, but as a temporary measure, you can charge your Nest thermostat with a USB cable.
- Pull ff the thermostat display and use the USB port on the back to charge it with a USB cable and wall charger. Depending on the model you have, it'll be either a mini or micro USB.
Note: Do not use a computer USB port or other unpowered USB port for charging. - The display should eventually light up with a message asking you to connect it to the base. Reconnect the display to the thermostat base. Press firmly until you hear it click into place.
- You can continue to install or use your Nest thermostat, but if you haven't fixed the underlying problem then your thermostat will lose power again. Continue with the steps below if that happens.
6. Your system may have a blown fuse
A blown fuse on your system’s control board can prevent power from reaching your thermostat. Contact a local professional to check your system and your thermostat wiring.
7. Check if your Nest thermostat is damaged
In rare cases, a Nest thermostat can be damaged by issues such as a power surge from your system, connecting it to an incompatible system, or by touching exposed wires together if power to the system hasn’t been turned off during installation.
You can test for this one of two ways:
Reinstall your old thermostat if needed
If your system works as it should with your old thermostat, your Nest thermostat may be damaged and needs to be replaced.
- Turn off power to your system at the breaker box or system switch. This will help protect your system and your thermostat from possible damage.
- Pull your Nest thermostat off the base and take a picture of the wires for reference.
Note: If you still have it, use the picture of the wires in your old thermostat that you were instructed to take during thermostat installation. - Uninstall your Nest thermostat and reinstall your old thermostat. Make sure that the wires are placed in the right connectors.
- Turn the power to your system back on and test that it’s working properly.
- If your system works with your old thermostat, try getting a professional to install your Nest thermostat. Make an appointment with our installation partner OnTech, to have a trained pro come to your home, install and set up your Nest products. If your Nest thermostat is damaged, or if you need a professional to service your system, the installer may let you know.
- If your heating and cooling system doesn’t work with your old thermostat either, there is probably an issue with your heating and cooling system. It could be a blown fuse on the furnace or a bad circuit breaker, and we’d recommend that you contact a local professional.
Contact our support team
They can walk you through steps to test your Nest thermostat without reinstalling your old one. Contact Nest support.
Contact a pro for help
If these steps don’t resolve the problem, you should contact a local Pro. The problem may be caused by an issue with your system.
Nest Thermostat
If your Nest Thermostat won’t turn on, the batteries could have drained or there could be a power issue.
If there’s a power issue, your thermostat’s battery will drain and it'll turn off Wi-Fi, the display, and other features to preserve battery life.
Before you begin
- Your thermostat should automatically turn on once it’s connected to your system, and your system is powered up or if you put in new batteries.
- During regular use, the screen may turn off if it doesn’t sense motion for a time. It'll turn back on when it senses someone is nearby or when someone uses the app to control it.
- When batteries start to get low, the thermostat will turn off features like Wi-Fi and motion sensing to preserve battery life before it must turn off completely. You might need to tap the right side of the thermostat to wake it up.
- If there's a help message on your thermostat or in the app, follow the troubleshooting steps in Troubleshooting Nest thermostat error codes.
- Some systems, including heating-only, cooling-only, zone-controlled, and heat pump systems, require a C wire or the Nest Power Connector. Go to g.co/nest/cwire for details.
Use the troubleshooting steps below only if your thermostat is unresponsive when you use the touch bar on the right side of the thermostat.
Remove the batteries and put them back in
- Pull your thermostat off its base and remove both batteries. Make sure that nothing is between the battery and the battery terminals.
- Put the batteries back in. Be sure to match the positive "+" and negative "-" ends of the batteries with the markings in the battery compartment.
- Press your thermostat onto the base until you hear it click.
- Your thermostat will take a few moments to turn on and restart.
Replace your batteries
Important: Use only high-quality 1.5 V AAA alkaline batteries from a known manufacturer.
- Pull the thermostat display off the base.
- Remove the old batteries from the back of the thermostat display.
- Insert the two new AAA alkaline batteries. Be sure to match the positive "+" and negative "-" ends of the batteries with the markings in the battery compartment.
- Push the thermostat display back onto the base until it clicks into place.
Contact a pro
If these steps don’t resolve the problem, you should contact a local Pro. The problem may be caused by an issue with your system.